Digishaktie e-KYC through
MeriPehchaan Portal
The Uttar Pradesh government has recently implemented a new requirement for students seeking to benefit from its free tablet and smartphone scheme. To streamline and enhance the distribution process, the government has made Aadhaar verification mandatory through the Digishakti portal.
Click Here for DigiShaktie eKYCSteps for Aadhaar Authentication on Digishakti Portal
Follow these simple steps to complete your e-KYC verification
Visit the Digishakti Website
Go to the Digishakti website at https://digishaktiup.in/app/EPramaan/SendServiceToEpramaan/ and click the "e-KYC through MeriPehchaan Portal" button.
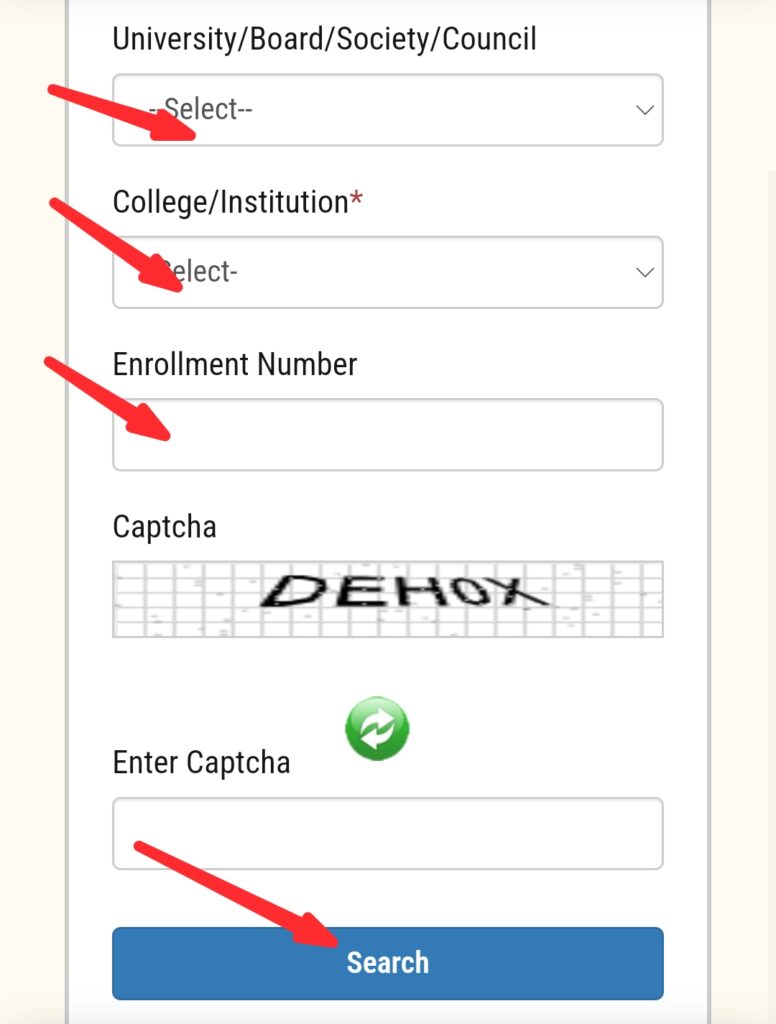
Search for Student Details
Once redirected, you will see a search form. Enter the required information in the fields provided (such as Enrollment Number). After filling in the details, click the "Search" button to proceed.
Check Aadhaar e-KYC Status
The portal will display the student's details. Look for the Aadhaar e-KYC Status. If the status is shown as "Pending," click on the button labeled "Verify through Login Using e-Pramaan MeriPehchaan."

Sign-In or Sign-Up on MeriPehchaan Portal
You will be redirected to the MeriPehchaan portal. Here, you need to either sign in or sign up:
For Existing Users: Enter your login credentials (username and password) to sign in.
For New Users: Click on the option that says "New user? Sign up for MeriPehchaan."

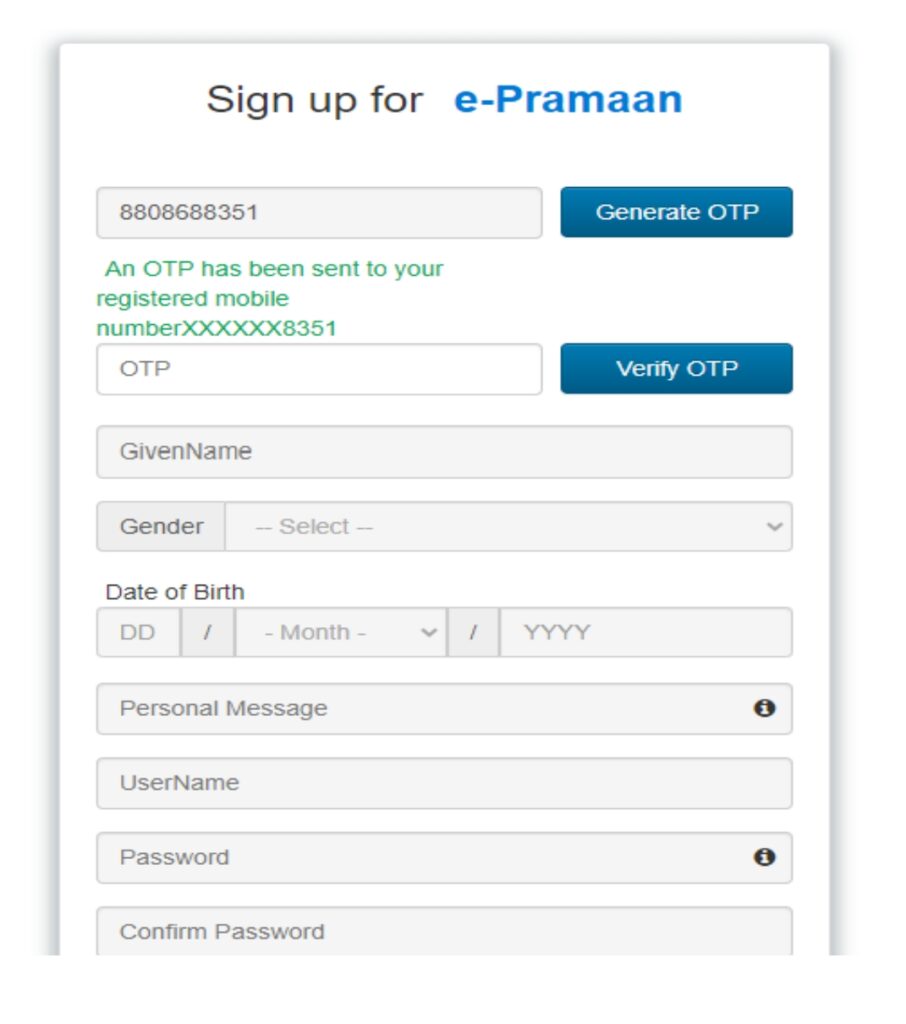
New User Registration
If you are a new user, you must register by entering your mobile number in the designated field. Click on "Generate OTP." An OTP (One-Time Password) will be sent to your mobile number. Enter the OTP in the designated field and verify it to proceed.
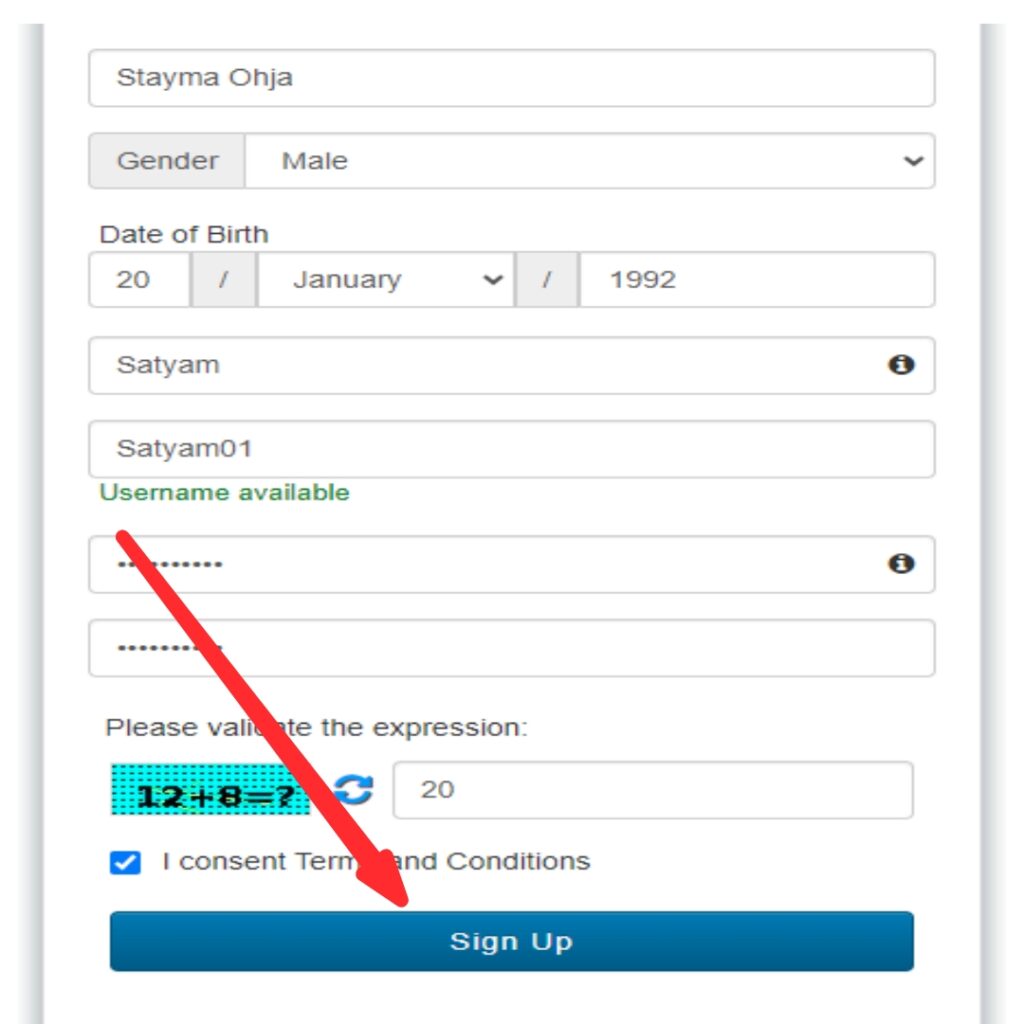
Accept Terms & Sign-Up
Carefully review the terms and conditions. You must accept these terms to continue with the registration. After filling in the required details and accepting the terms and conditions, click on the "Sign-Up" button to finalize the registration process.
Aadhaar e-KYC Verification
The Aadhaar e-KYC page will appear. Enter your Aadhaar number, select your OTP medium (mobile or email), and click on the "Verify through e-KYC" button.

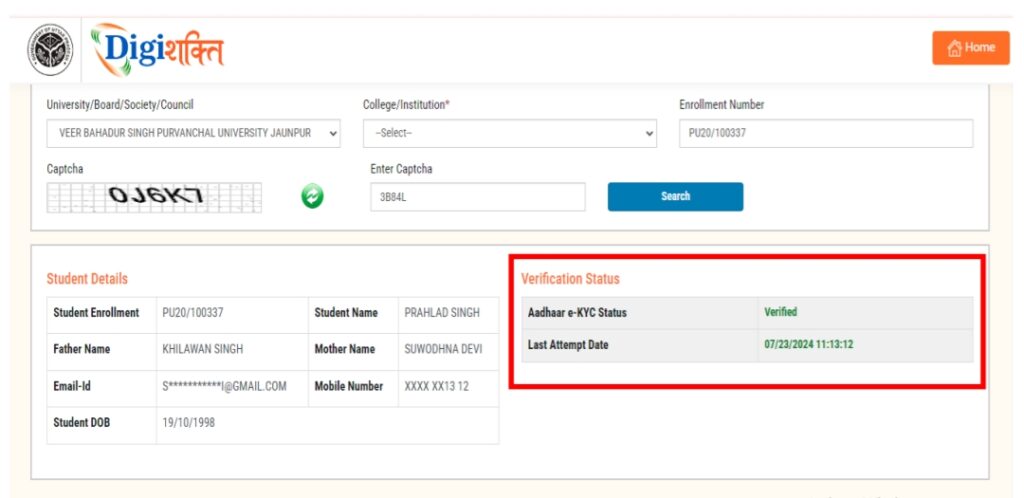
Successful Verification
If the verification is successful, you will see a confirmation message. After successful verification, the status on the "Search Student Details" page will change to "Verified," and the "Verify through Login Using e-Pramaan MeriPehchaan" button will disappear.
In case of "Verified" Status
The student's data will be visible at the institute level for forwarding to the District Nodal Officer to receive the device. If the data has already been forwarded to the district, it will be visible to the District Nodal Officer for selection.
Handling Name Mismatch or Failures
If there is a mismatch between the details (Name, Gender, & Date of Birth) on the Digishakti Portal and the Aadhaar details, an alert message with the mismatched details will appear. If the Verification Status on the Digishakti Website shows as "Failed," you will need to take action.
In case of "Failed" Status
Reach out to your Institution Nodal Officer to address any discrepancies in the details on the Digishakti portal or to update the information on your Aadhaar card. After making corrections, the student's data will undergo the complete authentication process (verification by the institution, approval by the university, and locking by the department). Once this process is complete, the data will be available again for Aadhaar verification by the student.